Fall is here! For this week’s blog you will learn how to make your own fall wreath with our new Grapevine Wreaths!
Crafts and simple DIY Projects are a great way to gather with friends and family. The great thing about this project is that all the materials can be purchased from SuperMoss.com. The rest can be foraged for in your own backyard or public park. For our project, we chose our 10″ grapevine wreath. In our opinion, grapevine wreaths are one of the most durable and natural-looking wreaths. The best part about them is that you can intertwine the elements through the branches, making for a simple DIY project. Keep reading to learn how to make your own fall wreath!
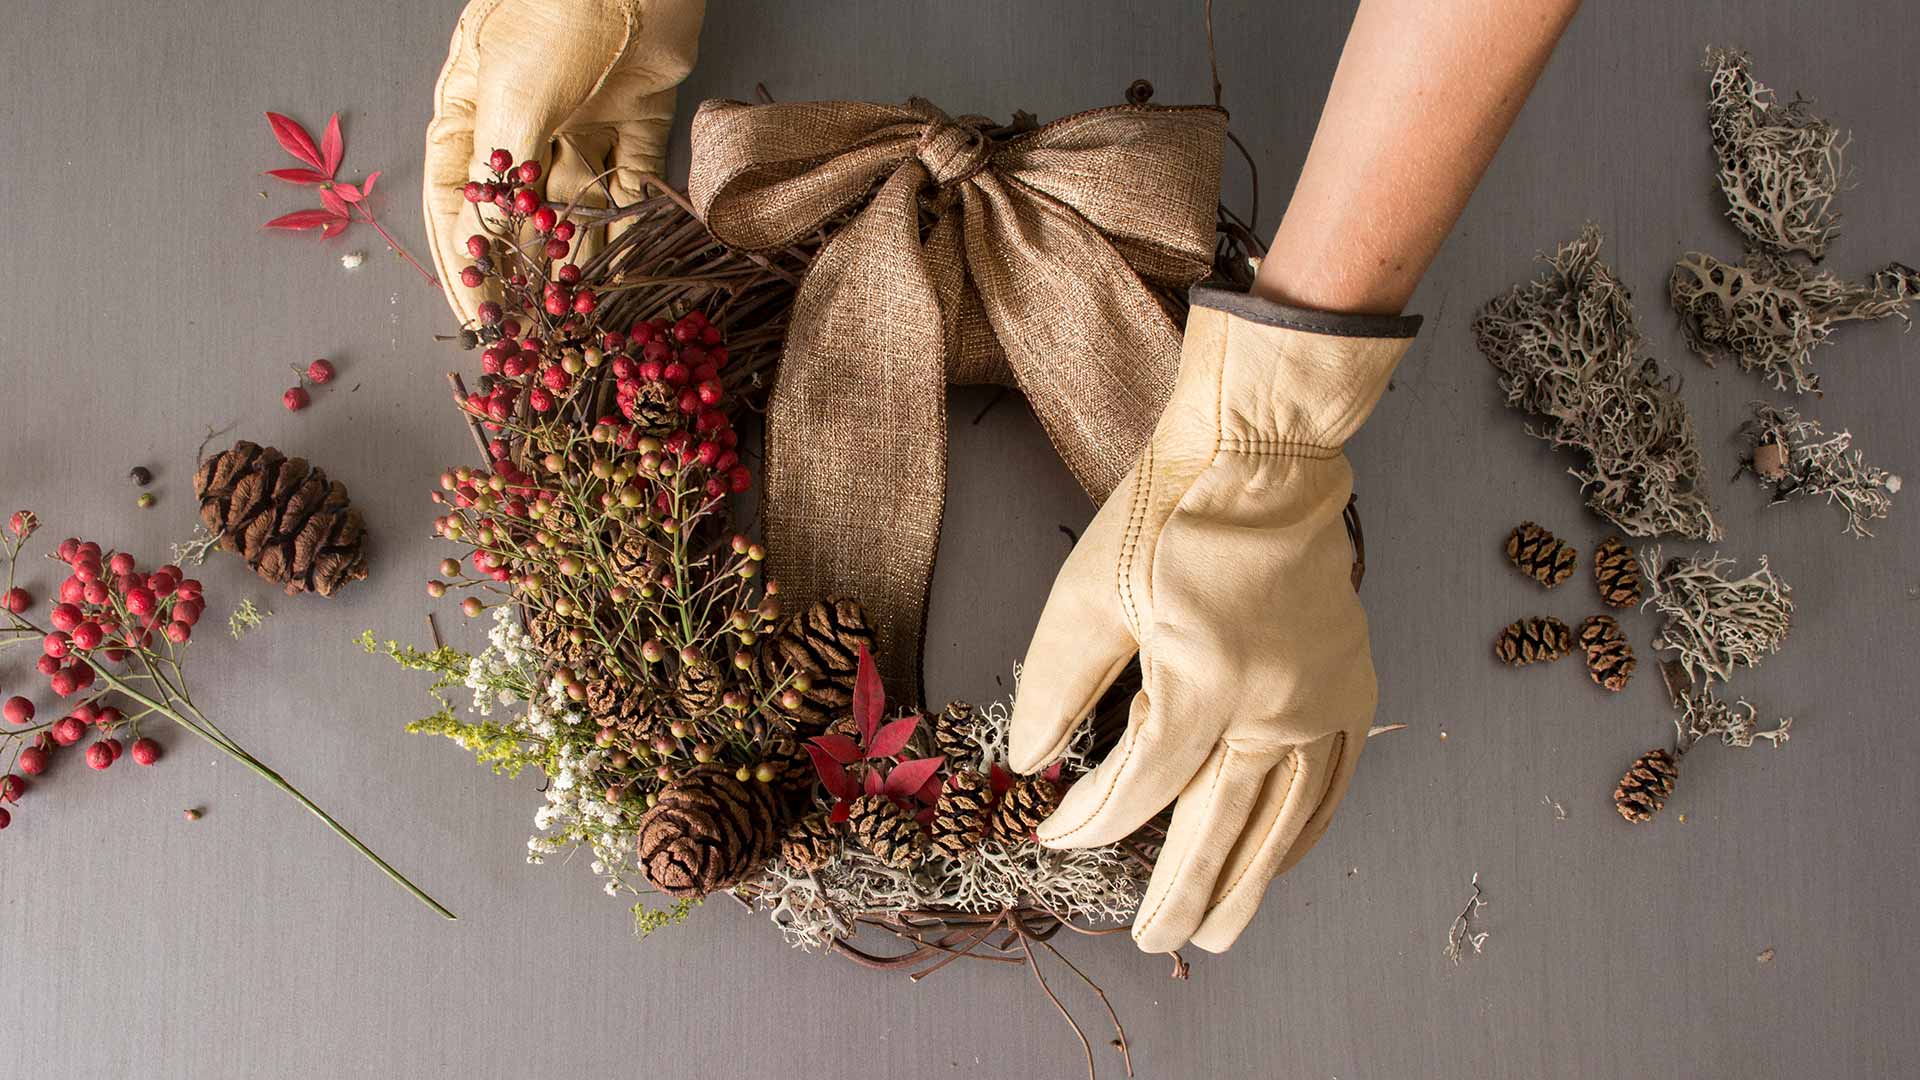
Materials
- 10″ Grapevine Wreath, Orchard Vine
- Assorted Floral Sprigs
- Mini Pinecones
- Lichen Parmelia
- Burlap Ribbon
Tools
- Hot Glue Gun
- Floral Wire (optional)
Keep in mind you can make different variations of this project! We encourage you to gather botanicals, fall leaves and other elements from your own backyard. Make it as simple or complex as you wish! Using earth tones is the key to make a a beautiful fall wreath. See below.

1. Start by Attaching the Largest Floral Elements on the Wreath
This will be the main element of your wreath, the one you want to stand out the most! For our wreath, we chose wild berries, alternating between the fall hues of red and orange.
While the decision is up to you, we decided to keep the florals limited to one side. This way, we would not take away from the beauty of the natural grapevine wreath.
Pro Tip: If you choose to weave the florals within the branches of the grapevine, there is really no need for the floral wire. It is up to you on whether or not you want to use it. Just make sure the pieces are secured on the wreath when you tilt it upright!

2. Trim and Layer Secondary Floral Elements
After your main elements have been added, begin layering the secondary elements on the outer edge of the wreath. For ours, we used a variation of wildflowers and Baby’s Breath. These elements will add more volume to your wreath!
Pro Tip: Leave about 1-2 inches of the stem so you can easily weave the sprigs through the branches

3. Tie a Bow on the Top
To us, no holiday wreath is complete without a burlap ribbon! Tie loosely, making sure that both loops are even.
Pro Tip: For an elegant look, fold the ends of the ribbon and cut at an angle to create a notch. See below

4. Glue Lichen to the Center of the Grapevine Wreath
Lichen is such a unique touch to a fall wreath! If you want your creation to stick out from others, try adding diverse botanical elements, such as Lichen or Spanish Moss. Make sure to glue each piece to ensure that it stays intact! Also, do not forget to let it dry for a minute before moving on to the next step!

5. Top off your Fall Wreath with Mini Pinecones!
SuperMoss Mini Pinecones are the perfect finishing touch to this fall wreath! Simply add glue to the pinecones and attach to the center of the lichen. You can also add more along the edge to compliment the botanicals.
Pro Tip: Plug in some red leaves from your backyard alongside the pinecones to add to the fall look!

6. Voila, You have Very Own Unique Fall Grapevine Wreath!
In less than 15 minutes you can turn a simple wreath into a finished seasonal decoration! Hang your wreath on your front door or even on your wall as part of your seasonal décor.

Final Thoughts
What is great about this project is that it can be recreated for any holiday. Just change up the color scheme and choose from an array of different Mosses and Lichens.
We hope this project will bring the joy of the holiday spirit to you and your family.
Be sure to stay on the look-out for upcoming contests and promotions via Instagram!
Happy Crafting!
Cheers,
-SuperMoss