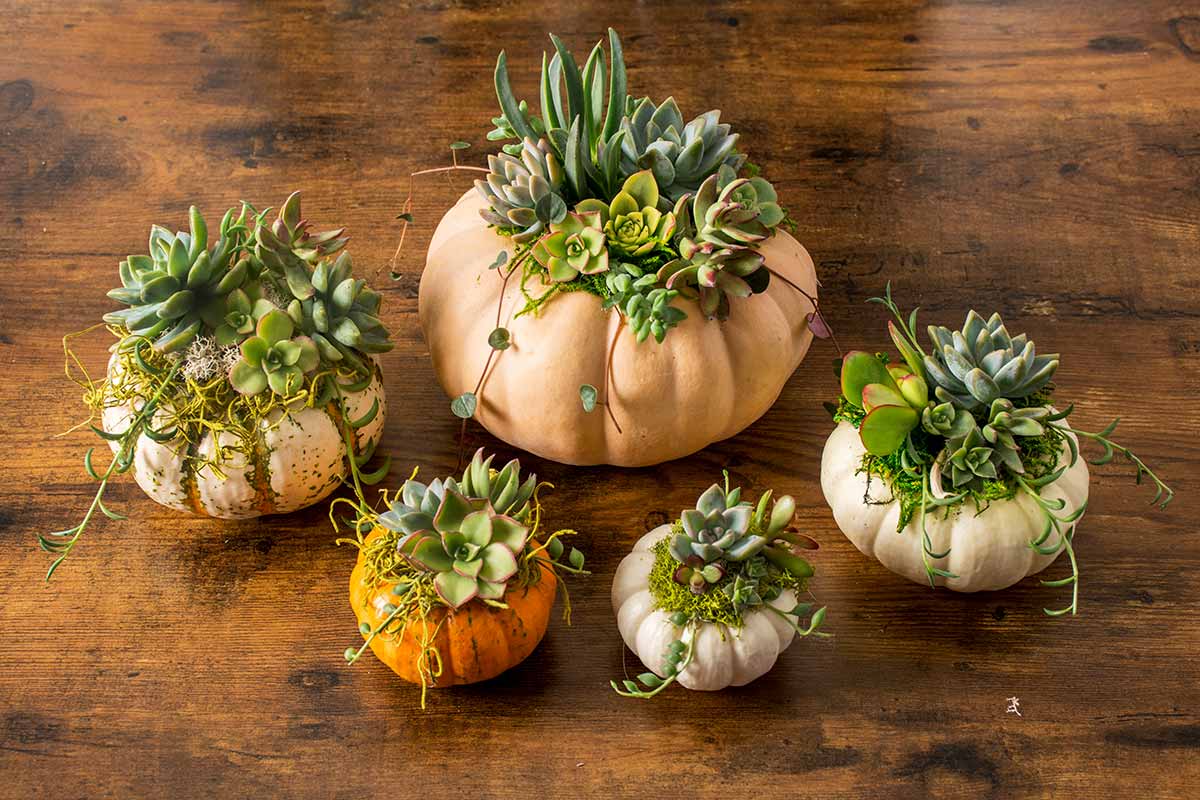
Halloween is right around the corner! Why carve pumpkins when you can make succulent pumpkins in half the time? They work great for outside decoration or in addition to your fall table settings.
Best of all, this is a simple DIY Project and can be completed in under 30 minutes.
Materials
- Pumpkins
- Succulent clippings
- Mosses
- Hot Glue Gun
Step 1: Gather your Succulent Clippings
We used a combination of fresh succulent clippings from our own garden! Just snip the succulent stems at an angle, no need to salvage any roots for them to regrow! That’s why we love succulents.
When choosing succulents make sure to get a variety of sizes and types. You will want to get an array of rosette succulents, which are succulents in the formation of a rose or flower petal- such as an Echeveria.
Consider choosing some taller and wispier succulents, which will add a vertical element to your arrangement – such as an Ice Plant. If you are a Californian you have probably seen them as a ground cover, characterized by their stunning magenta blooms!
Lastly, choose some trailing succulents that will hang over the edge of the arrangement. These can be String of Pearls, String of Bananas, or Burro’s Tail!

Step 2: Hot Glue Moss on Pumpkin
Next, apply a light amount of glue to the pumpkin and then attach the moss from there. Don’t be afraid to pile the moss on! We are biased of course, but the more moss the better! We just love the way the Spanish Moss sticks out of the pumpkin tops. Not to mention, mosses are a great way to keep succulent clippings after being trimmed.
In our arrangements, we used:
To add a spooky touch, you can even try our Halloween Moss Mix for this project!

Step 3: Place the Star Succulent on the Center
When making succulent arrangements, you want to make sure you have a “Star Succulent” – this will be the largest succulent and the one you want to stand out the most. In our example, the star succulent is a rosette succulent – Graptosedum ‘Ghosty’.
Just apply a very tiny amount of glue to the bottom of the cutting and attach it to the moss.

Step 4: Fill in the Empty Spaces with Filler and Trailing Succulents
The “fillers” refer to a mix of succulents that will surround the star succulents. If you are doing mini pumpkins, these may be just 2 or 3 smaller rosettes of differing colors. These will add depth to your arrangement. The key here is to make sure that these elements do not outshine the star succulent.
The trailing succulents will drape over the edge of your pumpkin, so cute! We used cuttings of the beloved fast-growing String of Bananas. See how to care for String of Bananas here.

Care and Tips
There will come a day when your pumpkin will die, but luckily the succulents can be salvaged and replanted. What is great about this project is that mosses are an excellent propagating medium for succulents. If receiving enough moisture and adequate light, the succulents will begin growing roots in the moss!
To ensure your succulents will thrive, be sure to keep them out of below freezing weather. If you live somewhere cold, it is best to keep your pumpkins inside. On the flip side, do not scorch your pumpkin arrangement with too much direct sunlight. This will shorten the lifecycle of your pumpkin AND it will burn the leaves of the succulents.
For best results, place the pumpkin in a place that receives indirect sunlight. This can be on a shaded porch or in a South or North Facing Window. To ensure that succulents will regrow, be sure to mist them ever couple of days.
Once the pumpkins dies off and there are some roots on the succulents you can place them in a small pot with well-draining succulent soil.

Happy Planting!
Cheers,
SuperMoss!
How do I care for the birdhouse
Do I hang it up and forget it. Also I live in Ohio. What do I do about winter weather
The moss-covered bird house’s need very little care and maintenance, just keep them out of extended direct sunlight to prevent color fading, they can get wet and an occasional mist will make them look more vibrant but be sure not to get them waterlogged. This is a preserved moss- not a live moss so it does not need watering itself. We recommend taking your house inside during winter months if you experience inclement weather.
[…] supermoss […]
[…] Get Crafty With Nature: Look for ways to turn pinecones, crooked branches, and dried leaves into spooky decorations. You could make a cool skeleton this way. I also love this idea for a succulent pumpkin. […]