Spring is the perfect time to start thinking about planting bulbs. With warmer temperatures and longer days, bulbs are ready to burst forth and add a splash of color to your space.
Using Grapevine Garland and Forest Moss as top dressing is a great way to add some extra style and texture to your Nest Bulb Garden.
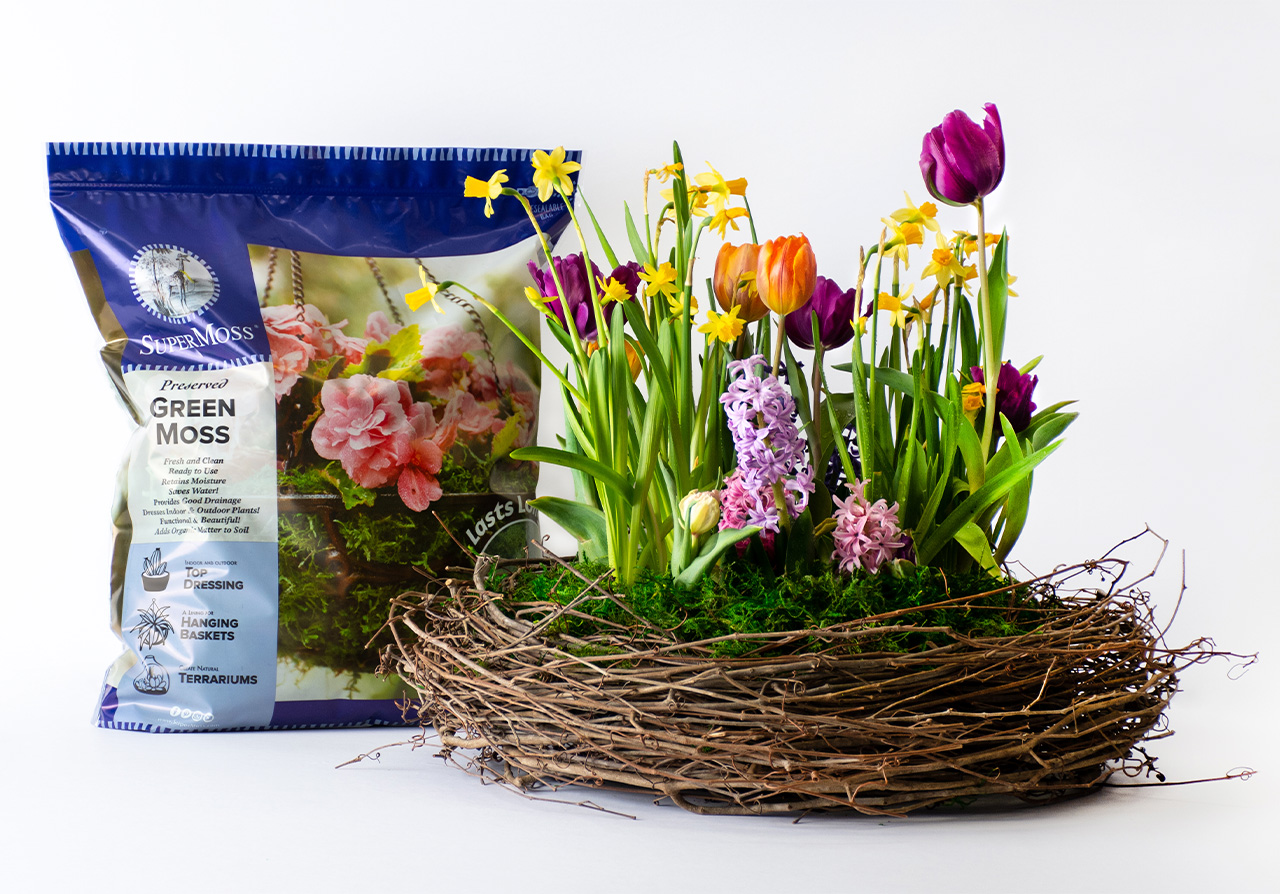
Here’s what you need to get started:
- Grapevine Garland
- Forest Moss
- Moss Floral Wire
- Plastic Tray / Plant Saucer Drip Tray
- Bulbs
Step 1: Make sure your tray will be fully covered with the Grapevine Garland and you have enough bulbs for your centerpiece.
Consider the size of your bulbs and the desired density of your centerpiece. Arrange the bulbs on the tray to determine the best placement and spacing for optimal coverage and visual appeal.

Step 2: Make a plan of where do you need to drill holes to secure the Tray to the Garland.
First, lay out the Garland on a flat surface and place the tray on top of it. Determine where you want to position the tray on the garland and mark the four corners of the tray with a pencil.
Once you have measured and marked the placement of the holes, use a small drill bit to create the holes you have marked. Make sure the drill bit is slightly bigger in diameter than the Moss Floral Wire you plan to use to secure the tray to the garland.

Step 3: Pre-cut a few pieces of Moss Floral Wire.
Using a wire cutter, snip off a few pieces of wire to your desired length, keeping in mind that you may need to adjust the length depending on the size and weight of the arrangement.

Step 4: Start wrapping the tray and secure the Garland with the Moss Floral Wire.
Begin by placing the garland around the edges of the tray. Then, use a piece of moss floral wire to secure the Garland to the tray by threading the wire through one of the pre-drilled holes in the garland and twisting it around the edge of the tray.
Continue this process, securing the garland to the tray every making sure to adjust the garland as needed to ensure that it is evenly distributed and covers the entire edge of the tray.

Step 5: Push the secured tray into the Garland all the way to the bottom.
Once the Garland is fully wrapped around the tray and secured, double-check that it is in place and adjust the wire as needed.
You are now ready to start adding your bulbs and other decorative elements to create a stunning centerpiece that will brighten up any room.

Step 6: Gently remove the largest bulbs from the original pot and place them in the tray.
Carefully remove the large bulbs from the original pot by gently loosening the soil around them with your fingers or a small garden trowel. Be careful not to damage the roots as you remove the bulbs.
Place the large bulbs in the tray, making sure that each bulb is at least two inches apart from each other.

Step 7: Use the small bulbs to fill in any empty areas.
Look for any empty spaces or gaps in the tray where you have placed the larger bulbs. These spaces should be filled with small bulbs. This will help to create a more full and uniform display of bulbs.

Step 8: Add preserved Forest Moss to secure the bulbs and create the finish touch of your centerpiece.
Once you have placed all the bulbs in the tray, spread the Forest Moss evenly over the surface of the soil, taking care not to damage any of the bulbs. The moss will help to secure the bulbs in place and create a natural-looking finish.
Place the centerpiece in a cool, bright location, and enjoy your beautiful and natural-looking centerpiece.


Pro Tip: Mist the surface of the soil and moss with water using a spray bottle. Be careful not to overwater, as this can cause the bulbs to rot. Monitor the soil moisture regularly to ensure that it stays evenly moist but not waterlogged.
Place the centerpiece in a cool, bright location, and enjoy your beautiful and natural-looking centerpiece.
