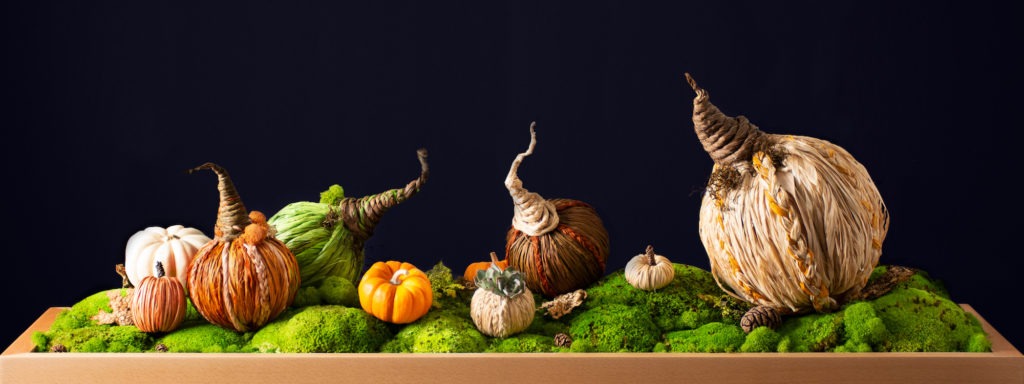
Pumpkins are always on our minds this time of year! This Raffia DIY is the perfect seasonal project to get the creative juices flowing. These pumpkins are a great no-carve alternative to create a swoon-worthy fall table. Get ahead on your fall decor with SuperMoss Raffia Kits.
Here’s what you’ll need:
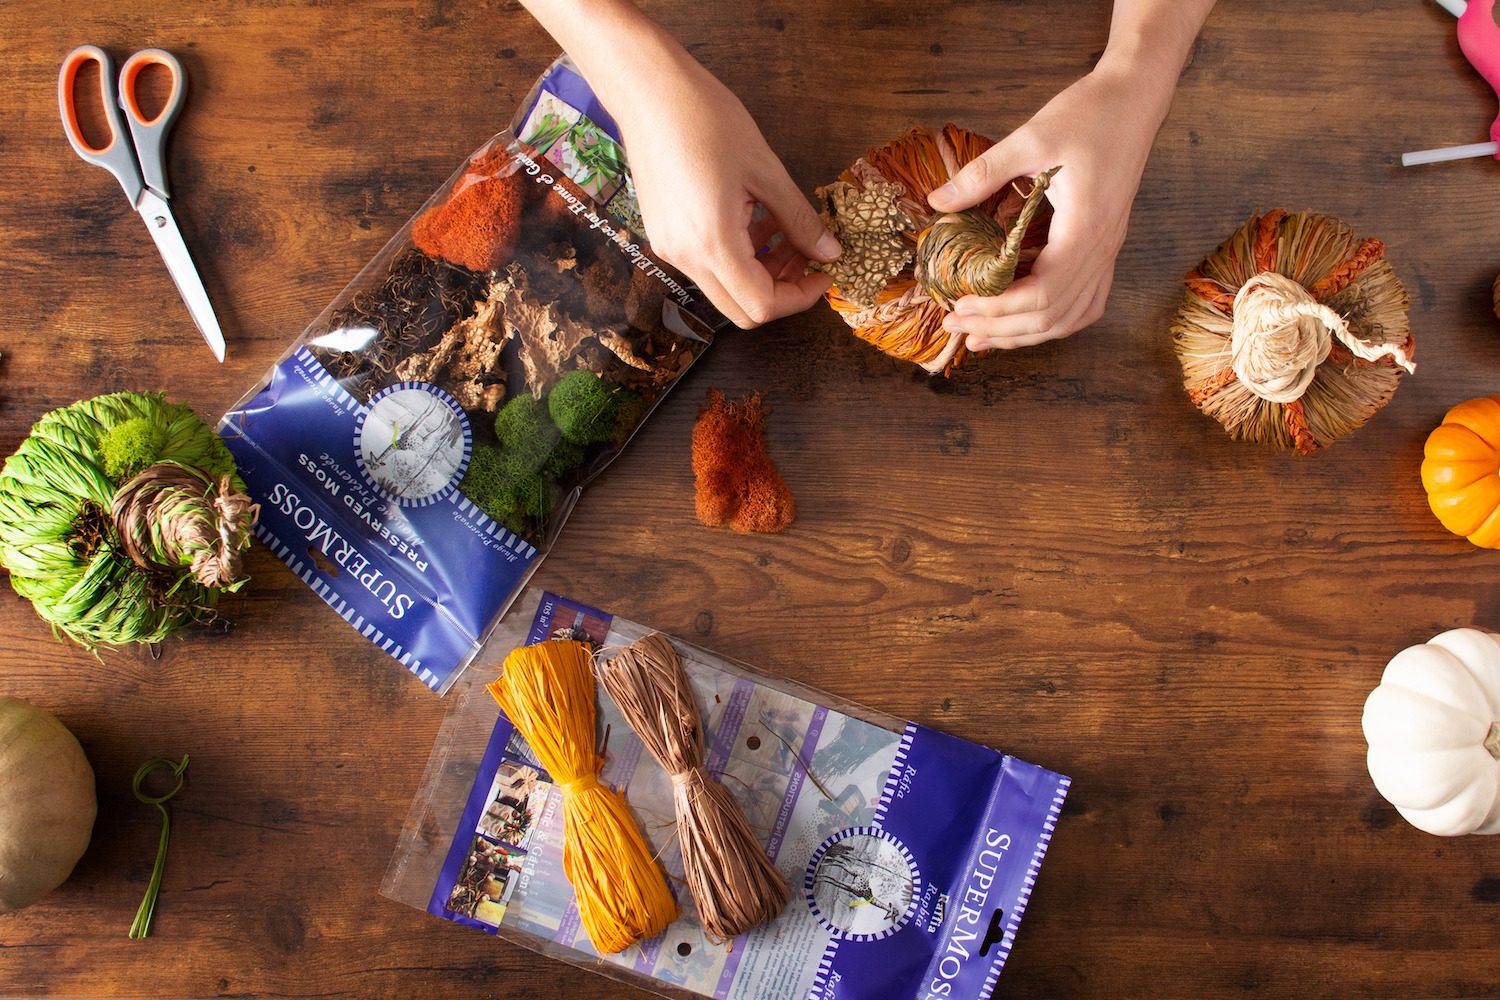
- SuperMoss Raffia Kit (we used about 3 kits for our pumpkin!)
- SuperMoss Moss Mix
- Pumpkin of your choice (we used this one )
- Hot glue gun, with plenty of extra sticks
- A pair of scissors
- Patience 🙂
Step 1: Remove the stem
Remove the stem of the pumpkin to create an easier surface to work on.

Step 2: Create Raffia bundles
Prepare your Raffia bundles to make the process quicker moving forward. Gather a quarter-sized amount of Raffia and measure it to the circumference of the pumpkin. Make a simple tie at each end of the raffia bundle, smoothing it out in between knots.

Step 3: Glue down Raffia
Warm up your hot glue gun and begin gluing. We used dots of hot glue on top for the first knot, on the bottom for the center of the Raffia, and at the top (opposite side) for the following knot. Continue this pattern until the whole pumpkin is covered with your base colors.


Step 4: Create Raffia accents
Next, we decided to pick an accent color and an alternative twist or braid to enhance our pumpkin! (This step is optional!)


Step 5: Create a new stem
When you’re happy with your pumpkin, it’s time to start on the stem. For this step we start with another Raffia bundle, twisting and looping it all the way to the top! Along the way, secure your cone shape with dots of hot glue. When you reach the end of your bundle, tie a small knot to avoid fraying.


Step 6: Enhance with Moss
After all of our Raffia steps, it’s time to move on to the Moss Mix. We chose to use our Vermont Mix since it features some really amazing colors and textures for Fall. Place your mosses and lichen wherever they fit best.
Pro tip: We recommend gluing some of the moss to the bottom of the pumpkin to aid in balance.

Step 7: Perfect your pumpkin
Trim away any excess Raffia or hot glue flyaways – and you’re done. These Raffia Pumpkins are the perfect accent for any fall home decor!

Happy Crafting!
This is such a fun and simple DIY project. The perfect activity for a Halloween night-in or a Friendsgiving activity!